Moving to WatchOS 2
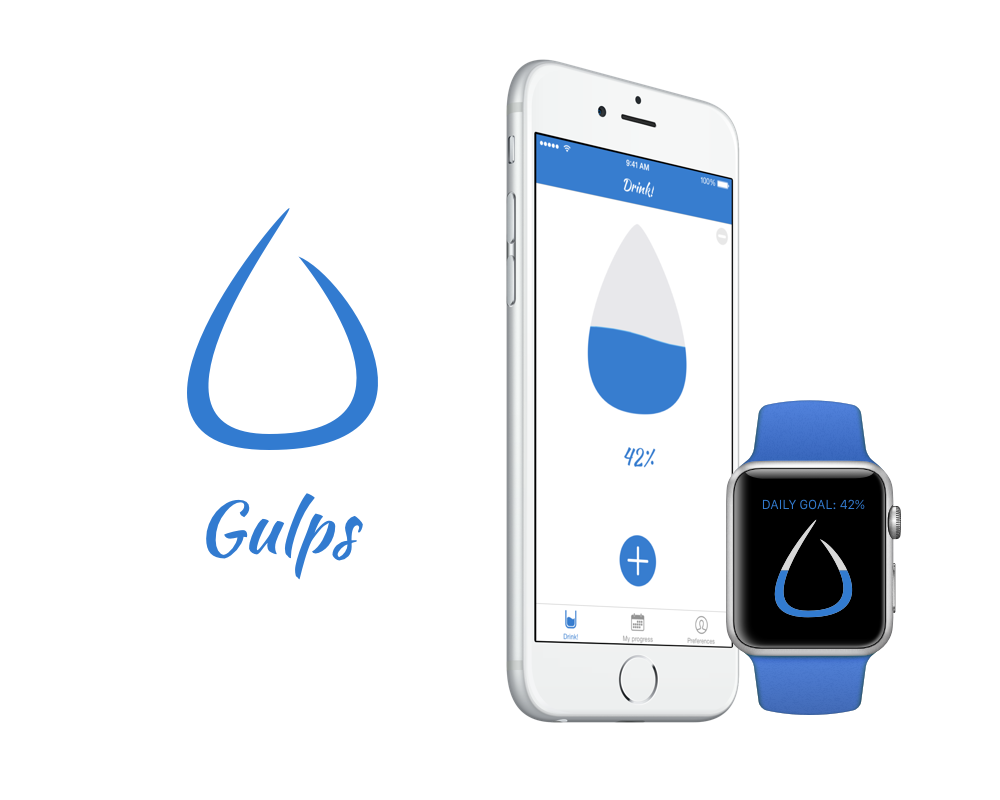
A while ago we released Gulps on the AppStore. Gulps is a simple water tracking app that also reminds you when to drink throughout the day.
This was an app of “firsts” for me: first Swift app, first full app open sourced, first WatchKit app, first HealthKit app, first 3D touch implementation. It’s my go-to app when I need to experiment with new stuff. The streak continues with WatchOS 2.
In this post we’ll cover how to share data between the main app and the watch extension with the WatchConnectivity framework, and how to create a simple set of watch face complications. As an added bonus we’ll be doing that with a full open source app, that’s live on the AppStore. Off we go.
Gulps
The previous version of Gulps relied on Apple’s App grouping to share data between the app and the watch extension. The data was stored on Realm, and thanks to its notification system, the watch app was always kept up to date when a change occurred. This was possible because the watch extension used to live on the phone alongside the main app. It was a brilliant system, and so easy to implement… my heart sank when Apple announced that they were moving the watch extension on the watch itself. I knew that a storm of refactoring was coming. Before opening that can of worms, let’s reminisce about the good old times.
This is the setup for a WatchOS 1 app:
realmToken = RLMRealm.defaultRealm().addNotificationBlock { note, realm in
    self.reloadAndUpdateUI()
}
Once a change occurred on the phone or on the Watch app, a broadcast notification was fired, triggering a closure that updated the UI.
If you want to know more about Realm and app grouping, checkout this article by yours truly. It still is the best way to share data between the main app and an extension (e.g: a today widget).

WatchOS 2
I do realize it took me a while to jump on the WatchOS 2 train, but since Gulps was fairly good received and reviewed, I wanted to be extra careful in handling the transition to the new OS. Just as a reminder, WatchOS 2 drastically changes how a watch app works, by moving the extension from the iPhone app to the Apple Watch itself.

This has a major advantages: less spinning spinner of spinning boredom, the app is a lot snappier, and can rely a lot less on the phone (e.g. by making independent network requests).
That’s cool, but it comes at a cost… sharing data as we did before is impossible.
Apple provided a new framework though: WatchConnectivity.
The framework offers different ways to enable the communication between the phone and the watch, but it can be really tricky to get everything working reliably.
We can say that WatchOS 2 added some complexity and some complications 😬.
Complications are small modules used to personalize the watch faces and show small tidbits of interesting data when the user glances at the time. Now we can finally add our own modules, and having the percentage of your daily water intake goal sounds pretty good (so good that users started to request them the day after WatchOS 2’s release).
Sharing
WatchConnectivity introduces four main ways to communicate between the phone and watch:
- Application Context, a dictionary with the latest up to date information. It’s transferred by the system in the background, and each new entry overwrites the old one. This is great to share the application current state
- Use info, similar to the application context, but the transfers are queued up and delivered in order, without overwrites
- File transfer to share files
- Interactive messages, used when both the app and the phone are active and in range. It’s a more interactive way to share data, ideal when the user needs to see the feedback on both screens.
For Gulps I picked Application Context sharing, since the current state of the daily progress is what really matters, and the user hardly uses both apps at the same time (although since the transfer is pretty fast, when he does, the feedback is still snappy).
All the code is available on GitHub, for sharing the data we’ll reference the WatchConnectivityHelper and WatchEntryHelper: here and here.
Setting up the session
Before communicating back and forth we need to enable the watch session on both the phone and the watch. We do this using WatchConnectivity’s singleton WCSession.
The session must be initiated as soon as possible, so the AppDelegate sounds like a reasonable place to to that on the phone counterpart:
public func setupWatchConnectivity(delegate delegate: WCSessionDelegate) {
    guard WCSession.isSupported() else {
        return
    }

    let session = WCSession.defaultSession()
    session.delegate = delegate
    session.activateSession()
}
The WCSessionDelegate protocol declares all the functions that can be triggered by the session. We only need to implement this one if we are interested in the application context, though:
func session(session: WCSession, didReceiveApplicationContext applicationContext: [String : AnyObject])
As the signature suggests, this is fired when there is an update in the application context, and the second parameter is the context itself, represented by a dictionary. We’ll cover this later.
Once the phone is set up we need to do pretty much the same on the watch side. A good place to initiate the session on the watch is in the watch extension delegate:
func applicationDidFinishLaunching() {
    setupWatchConnectivity()
}

// MARK: - Watch Connectivity

private func setupWatchConnectivity() {
    guard WCSession.isSupported() else {
        return
    }

    let session  = WCSession.defaultSession()
    session.delegate = self
    session.activateSession()
}
All set up, time to think about how to communicate.
From phone to watch
All the utility functions to send and read data from the watch are held in a handy struct: WatchConnectivityHelper, and an instance of this struct is held by the AppDelegate. We need a way to be notified when a change occurs on our database, so that we can trigger an update to the application context. As I mentioned before, Realm makes this pretty easy, thanks to Realm Notifications. Soon after the session is set a new Realm notification is created (the token needs to be strongly held):
realmNotification = watchConnectivityHelper.setupWatchUpdates()
setupWatchUpdates implementation is straightforward:
/**
 Updates data on WatchOS, and listens for changes
 - Returns: RLMNotificationToken that needs to be retained
 */
public func setupWatchUpdates() -> RLMNotificationToken {
    // Send the current data right away
    sendWatchData()
    return EntryHandler.sharedHandler.realm.addNotificationBlock { note, realm in
        // Once a change in Realm is triggered, refresh the watch data
        self.sendWatchData()
    }
}
This opportunistically sends the current status right away, and creates a new token that, once a change is triggered, calls again the method that sends the application context.
This is a good time to think about what we really need on the watch, and model our application context accordingly. We want to keep the data transfer at a minimum to avoid lengthy transfer times, while having all what we need at hand. For my purpose all I need is the current user status, his daily goal and his portion sizes (they might change over time, so they need to be refreshed often).
public class func watchData(current current: Double) -> [String: Double] {
    let userDefaults = NSUserDefaults.groupUserDefaults()
    return [
        Constants.Gulp.Goal.key(): userDefaults.doubleForKey(Constants.Gulp.Goal.key()),
        Constants.WatchContext.Current.key(): current,
        Constants.Gulp.Small.key(): userDefaults.doubleForKey(Constants.Gulp.Small.key()),
        Constants.Gulp.Big.key(): userDefaults.doubleForKey(Constants.Gulp.Big.key())]
}
Once the data packet is ready we can shoot it to the watch:
/**
 Sends the current data to WatchOS
 */
public func sendWatchData() {
    guard WCSession.isSupported() else {
        return
    }

    let watchData = Settings.watchData(current: EntryHandler.sharedHandler.currentEntry().quantity)
    let session = WCSession.defaultSession()
    session.activateSession()
    if session.watchAppInstalled {
        do {
            try session.updateApplicationContext(watchData)
        } catch {
            print("Unable to send application context: \(error)")
        }
    }
}
To send the new context we need to make sure that the watch app is in fact installed, and then we call updateApplicationContext(_:), function that might throw, so it needs to be called with try.
On the watch end we need to wait for a WCSessionDelegate call and store the new stuff:
func session(session: WCSession, didReceiveApplicationContext applicationContext: [String : AnyObject]) {
    if let goal = applicationContext[Constants.Gulp.Goal.key()] as? Double,
        let current = applicationContext[Constants.WatchContext.Current.key()] as? Double,
        let small = applicationContext[Constants.Gulp.Small.key()] as? Double,
        let big = applicationContext[Constants.Gulp.Big.key()] as? Double {
            WatchEntryHelper.sharedHelper.saveSettings(goal: goal, current: current, small: small, big: big)
            NSNotificationCenter.defaultCenter().postNotificationName(NotificationContextReceived, object: nil)
            self.reloadComplications()
    }
}
Since we are implementing all this in the Extension delegate, to update the interface (in the off chance that the user is staring at both his phone and watch with both apps running) we toss a notification through the NSNotificationCenter, letting the interface controller handle that with an animation. Another approach would be to force a reload of the interface controller, but that would prevent such animation.
Luckily the communication between watch and phone works pretty much the same way.
You’ll notice that once the application context updates I also reload the complications, let’s talk about that.
Life is not that complicated
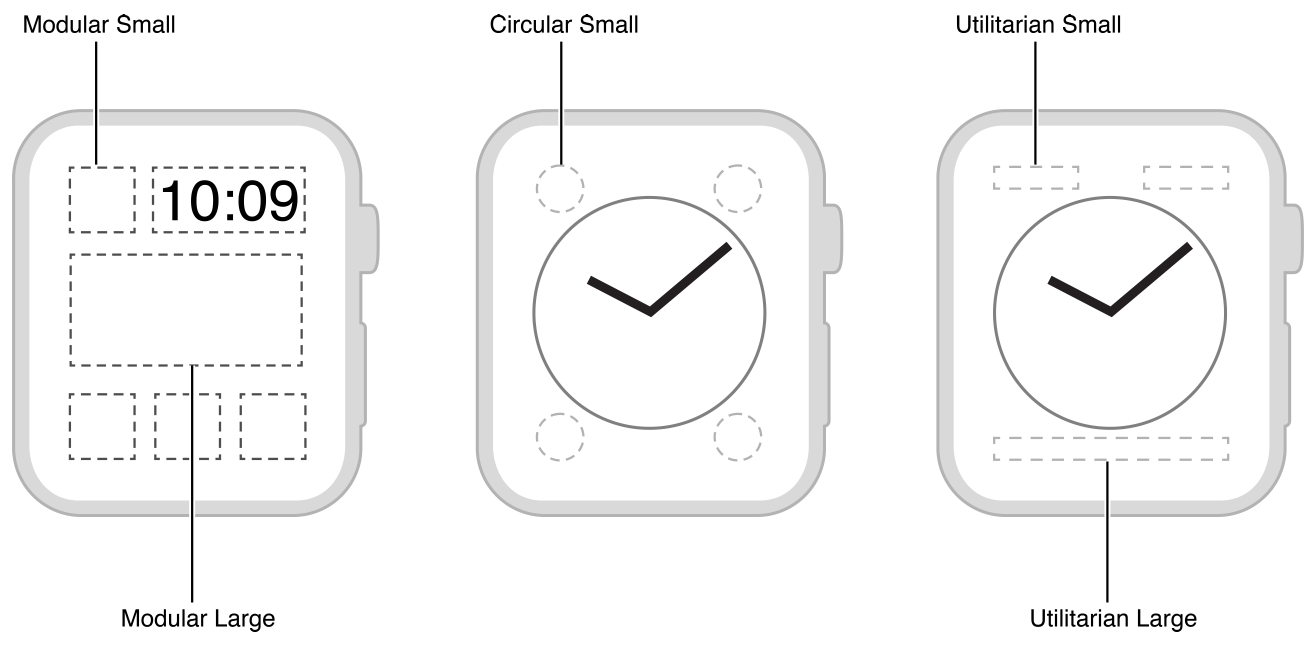
Complications are elements that live on the watch face and can be customized by the user. There are different kinds of complications with different sizes, depending on the space that they are displayed on. These are the possible complication families that we can implement:

Complications are provided by a single object that implements the CLKComplicationDataSource protocol. This object is declared straight in the watch app’s Info.plist file, and gets loaded automatically by the system.
A single complication can offer a static snapshot of the current situation (the current temperature, your activity data, or in Gulp’s case the current daily goal’s completion rate), and it also can offer time travel features, allowing the user to nudge the digital crown to have a past or future snapshot. Time travel is great for apps that already know the future, but won’t fit the bill with Gulps, so you won’t see its implementation here. If you want to learn more, jump to the end of this post for a bunch of references.
CLKComplicationDataSource
In our case the datasource methods that need an implementation are these two:
func getPlaceholderTemplateForComplication(complication: CLKComplication, withHandler handler: (CLKComplicationTemplate?) -> Void)
func getCurrentTimelineEntryForComplication(complication: CLKComplication, withHandler handler: (CLKComplicationTimelineEntry?) -> Void)
The first function requests a template for a given complication type. A template is a simple static placeholder that is shown to the user while he’s configuring the watch face. The second function requests the current complication that needs to be loaded. They both require you to call a completion handler with the correct object for each complication you support. You declare the support to a given complication type in the project’s settings.

Let’s take a look at the templates:
func getPlaceholderTemplateForComplication(complication: CLKComplication, withHandler handler: (CLKComplicationTemplate?) -> Void) {
    if complication.family == .UtilitarianSmall {
        let smallFlat = CLKComplicationTemplateUtilitarianSmallFlat()
        smallFlat.textProvider = CLKSimpleTextProvider(text: "42%")
        smallFlat.imageProvider = CLKImageProvider(onePieceImage: UIImage(named: "complication")!)
        smallFlat.tintColor = .mainColor()
        handler(smallFlat)
    }
    // ...
}
Pretty mundane bit of code, we check which complication family was requested, and we provide one. Complications have many settings and preset types, so I encourage you to check Apple’s reference guide.

The final complication setup doesn’t differ too much from the template, beside the obvious current value that replaces the pre baked placeholder:
func getCurrentTimelineEntryForComplication(complication: CLKComplication, withHandler handler: (CLKComplicationTimelineEntry?) -> Void) {
    let percentage = WatchEntryHelper.sharedHelper.percentage() ?? 0

    if complication.family == .UtilitarianSmall {
        let smallFlat = CLKComplicationTemplateUtilitarianSmallFlat()
        smallFlat.textProvider = CLKSimpleTextProvider(text: "\(percentage)%")
        smallFlat.imageProvider = CLKImageProvider(onePieceImage: UIImage(named: "complication")!)
        smallFlat.tintColor = .mainColor()
        handler(CLKComplicationTimelineEntry(date: NSDate(), complicationTemplate: smallFlat))
    }
    // ...
}
Check out the full source here.
Reloading complications
So, the user fills his progress, goes to sleep, picks up the watch in the morning and… there it is… his previous percentage still showing.
Finding a way to reset the percentage wasn’t that straightforward, since I’m only refreshing the complications when a new portion is added.
As it turns out though, the data source protocol holds a pretty handy function:
/** This method will be called when you are woken due to a requested update. If your complication data has changed you can
 then call -reloadTimelineForComplication: or -extendTimelineForComplication: to trigger an update. */
optional public func requestedUpdateDidBegin()
A-ha! WatchOS asks your complications how they are feeling every once in a while… so kind of him. We can use this opportunity to reset the complications:
func requestedUpdateDidBegin() {
    let server = CLKComplicationServer.sharedInstance()

    server.activeComplications.forEach { server.reloadTimelineForComplication($0) }
}
Since the model holds the date of the last update, it’s easy to check when a percentage is stale:
/**
 Returns the current quantity
 It also checks if the data is stale, resetting the quantity if needed
 - Returns: Double the current quantity
 */
func quantity() -> Double {
    let quantity = userDefaults.doubleForKey(Constants.WatchContext.Current.key())

    if let date = userDefaults.objectForKey(Constants.WatchContext.Date.key()) as? NSDate {
        if let tomorrow = date.startOfTomorrow where NSDate().compare(tomorrow) != NSComparisonResult.OrderedAscending {
            // Data is stale, reset the counter
            return 0
        }
    }

    return quantity
}

You can head to the GitHub repo of Gulps and compile it, or even better download it from the store, and you’ll notice that the WatchOS app is a lot snappier, and the communication time between the two devices is pretty fast.
I’m pretty happy with it, but it required a good dose of patience. WatchConnectivity works great when you are learning it with a simple demo app, but once you factor in an app just a little bit more complex, you’re in for a treat. In the end it all boils down to figuring out what needs to be transfered and when. It doesn’t help that getting the app compiled on a real device requires quite a lot time. You’ll be seeing the loading spinner A LOT, soldier on.
With that being said, in the end the app runs way smoother, so it’s all worth it.
References
You can read more on the WatchConnectivity framework in this article by Natasha Murashev (who was also kind enough to contribute to this project), this one by Kristina Thai or Raywenderlich’s one written by Mic Pringle.
Also Raywenderlich’s “watchOS 2 by Tutorials” was of great help, consider picking it up if you want to delve deeper into WatchOS development.
Until next time,
Andrea