Playing With UIDynamics in iOS 9
UIDynamics was a welcome addition to the iOS 7 SDK. It’s basically a physics engine backing common UIViews, allowing us to define physics traits to the UI elements. The API is fairly straightforward, so you can easily create animations and transitions that look and feel great. I already covered the basics in this article a while ago, this time we’ll be looking at what’s new in UIDynamics in iOS 9.
Collision Bounds
The first release of UIDynamics shipped with a collision system (provided by UICollisionBehavior) that only supported rectangular bodies. It made sense, since UIViews are backed by rectangular frames, but it’s not uncommon to have a circular view, or even better our own custom Bezier path. With iOS 9 a new property has been added to the UIDynamicItem protocol: UIDynamicItemCollisionBoundsType, which accepts one of these enum values:
RectangleEllipsePath
The property is readonly, so if we want to change it we need to provide our own subclass:
class Ellipse: UIView {
  override var collisionBoundsType: UIDynamicItemCollisionBoundsType {
    return .Ellipse
  }
}
This is a UIView with the default collision bound:
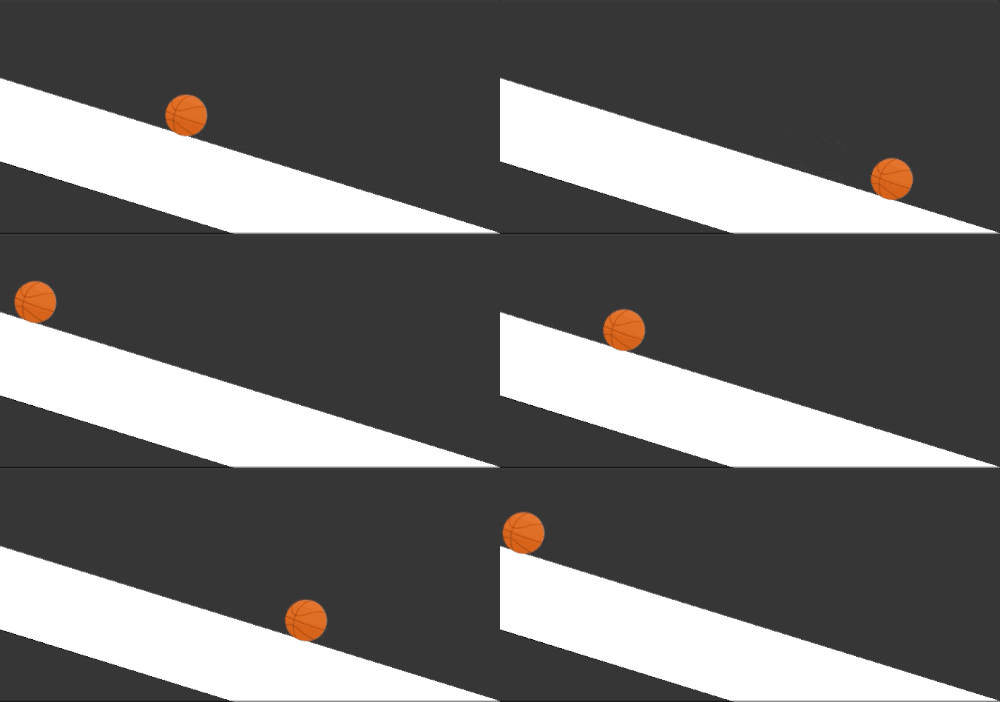
This is the same UIView with the .Ellipse:
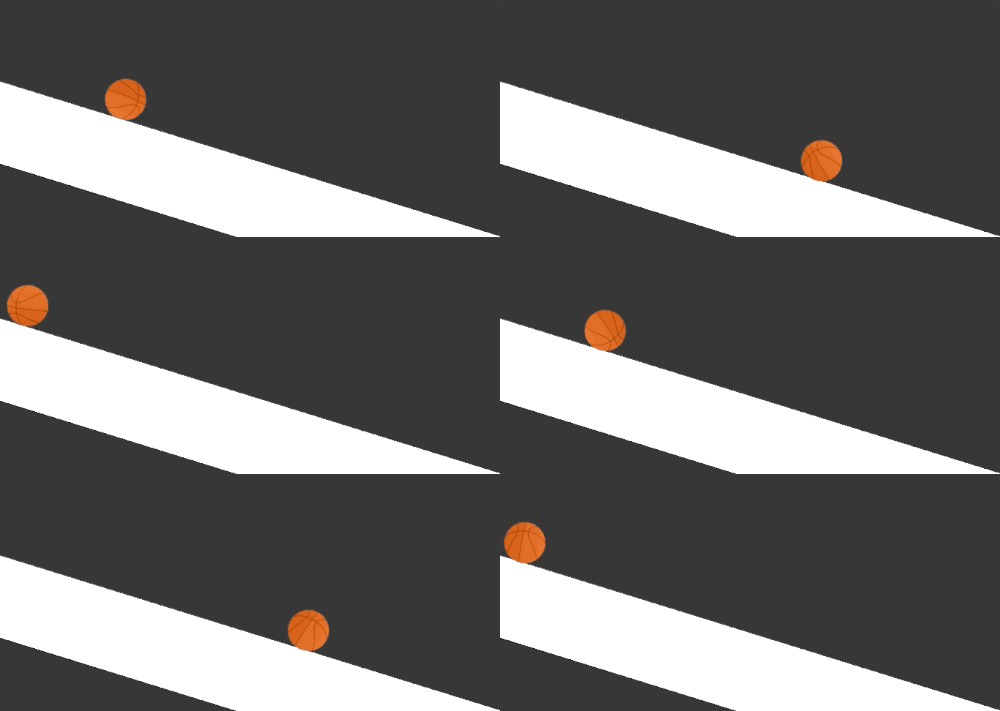
This covers round views, if we want to get fancy and draw a more complex view with a coherent rigid body we can use the enum property .Path and also override this property:
var collisionBoundingPath: UIBezierPath { get }
The path can be whatever you can think of, as long as it’s convex (this means that for any given couple of points inside the polygon, the segment between the two is always entirely contained in the polygon itself) and counter-clockwise wound.
The convex requirement could be a significant limit, so UIDynamicItemGroup was introduced to specify shapes as a group of different shapes. This way as long as each shape in the group is convex we are fine even if the resulting polygon composition is concave.
Field Behavior
Field behaviors are a new type of behavior that is applied to the whole scene. The most common example that we’ve been using implicitly all along is UIGravityBehavior, which applies a down force to each item in the scene. Now we can use a new set of field forces, like Radial (the forces are stronger at the center and weaker around the edges), Noise (forces with different magnitudes are scattered around the field), and so on.
Dynamic Item Behavior
UIDynamicItemBehavior received a couple of interesting new properties:
var charge: CGFloat
var anchored: Bool
charge represent the electric charge that can influence how an item moves in an electric or magnetic field (yeah, it’s bonkers), while anchored basically turns a shape into a static object that participates in the collisions, but without response (if something crashes into the item, it won’t budge), so it’s perfect to represent something like a floor or a wall.
Attachment Behavior
UIAttachmentBehavior was revamped and now has a sleuth of new methods and properties, like frictionTorque and attachmentRange. The attachments can now be more flexible, we can specify relative sliding movements, fixed attachments, rope attachments and what I like the most: pin attachment. Think of two objects nailed together and you get the idea.
This more or less covers what’s new in UIDynamics, now it’s time to drop the changelog and start building something silly.
Let’s play ball
I’ve been spending a lot of idle time with Ball King in the last week. It’s a brilliant little time waster, the concept is simple but well executed. Also it adopts the same monetization policies of the Apple design winner Crossy Road: it doesn’t bother the player in any way. Kudos.
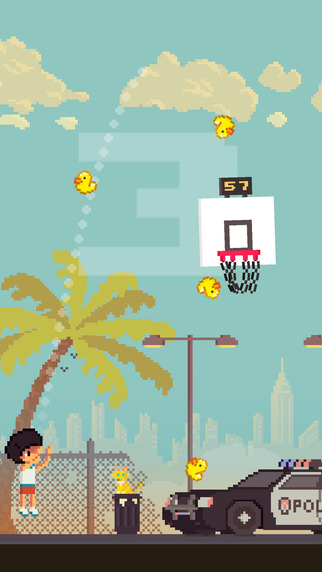
One thing I really like about it is the physic model of the ball and how the hoop’s backboard reacts when it gets hit by it. Looks like a fun exercise to test out the new UIDynamics stuff listed above. Let’s take a step by step look at how to build our own scruffy version: BallSwift
The hoop
The basket can be created with a single UIView acting as the backboard, a couple of views with rigid bodies as the left and right arms of the hoop, and a frontmost view as the hoop itself (without a physic body). Using the previously defined class Ellipse we can create the visual representation of our game scene:
/*
Build the hoop, setup the world appearance
*/
func buildViews() {
  board = UIView(frame: CGRect(x: hoopPosition.x, y: hoopPosition.y, width: 100, height: 100))
  board.backgroundColor = .whiteColor()
  board.layer.borderColor = UIColor(red: 0.98, green: 0.98, blue: 0.98, alpha: 1).CGColor
  board.layer.borderWidth = 2

  board.addSubview({
    let v = UIView(frame: CGRect(x: 30, y: 43, width: 40, height: 40))
    v.backgroundColor = .clearColor()
    v.layer.borderColor = UIColor(red: 0.4, green: 0.4, blue: 0.4, alpha: 1).CGColor
    v.layer.borderWidth = 5
    return v
    }())

  leftHoop = Ellipse(frame: CGRect(x: hoopPosition.x + 20, y: hoopPosition.y + 80, width: 10, height: 6))
  leftHoop.backgroundColor = .clearColor()
  leftHoop.layer.cornerRadius = 3

  rightHoop = Ellipse(frame: CGRect(x: hoopPosition.x + 70, y: hoopPosition.y + 80, width: 10, height: 6))
  rightHoop.backgroundColor = .clearColor()
  rightHoop.layer.cornerRadius = 3

  hoop = UIView(frame: CGRect(x: hoopPosition.x + 20, y: hoopPosition.y + 80, width: 60, height: 6))
  hoop.backgroundColor = UIColor(red: 177.0/255.0, green: 25.0/255.0, blue: 25.0/255.0, alpha: 1)
  hoop.layer.cornerRadius = 3

  [board, leftHoop, rightHoop, floor, ball, hoop].map({self.view.addSubview($0)})
}
Nothing new here, the hoop is created programmatically and is placed in the constant CGPoint hoopPosition. The order of the views is important though, since we want the hoop to be above the basket ball.
Nuts and bolts
The most important part of the hoop are the left and right arms. They need a physical round body (so that the collision with the ball is smooth) and need to be bolted to the board and the front hoop. These two will be basic UIDynamicItems and won’t partecipate directly in the collisions. The newly introduced pin attachment is perfect for this job, it can hold everything together quite nicely as we can see in this rather ugly drawing:
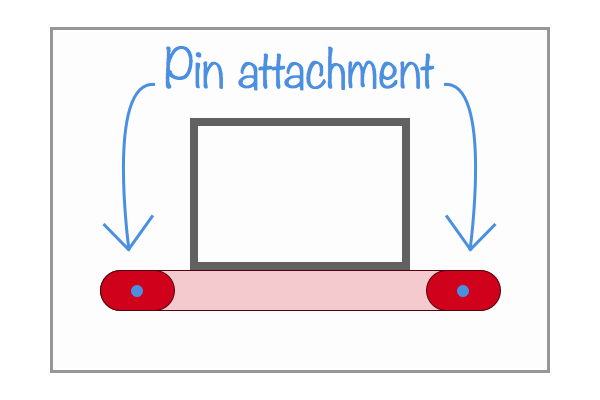
The pin can be attached only to a couple of views at a time, within a given absolute spatial point:
let bolts = [
  CGPoint(x: hoopPosition.x + 25, y: hoopPosition.y + 85), // leftHoop -> Board
  CGPoint(x: hoopPosition.x + 75, y: hoopPosition.y + 85), // rightHoop -> Board
  CGPoint(x: hoopPosition.x + 25, y: hoopPosition.y + 85), // hoop -> Board (L)
  CGPoint(x: hoopPosition.x + 75, y: hoopPosition.y + 85)] // hoop -> Board (R)

// Build the board
zip([leftHoop, rightHoop, hoop, hoop], offsets).map({
  (item, offset) in
  animator?.addBehavior(UIAttachmentBehavior.pinAttachmentWithItem(item, attachedToItem: board, attachmentAnchor: bolts))
})
If you’re not participating in the race to Swift’s functional awesomeness you’re probably not familiar with zip and map. It might seem contrived at first, but it’s rather simple: each view is coupled with the offset point in which we’re going to pin the attachment, resulting in an array of tuples that is then used in the map function that, as the name suggests, creates a mapping with each element of the array with the provided closure. This results in both the left and right arms of the hoop to be bolted to the board and the front hoop as follows:
- Left arm bolted to the left of the board
- Right arm bolted to the right of the board
- Hoop bolted to the left of the board
- Hoop bolted to the left of the board
The next step requires us to hang the board, letting it rest loosely, so that a collision can cause it to swivel a bit like it does in Ball King:
// Set the density of the hoop, and fix its angle
// Hang the hoop
animator?.addBehavior({
  let attachment = UIAttachmentBehavior(item: board, attachedToAnchor: CGPoint(x: hoopPosition.x, y: hoopPosition.y))
  attachment.length = 2
  attachment.damping = 5
  return attachment
  }())

animator?.addBehavior({
  let behavior = UIDynamicItemBehavior(items: [leftHoop, rightHoop])
  behavior.density = 10
  behavior.allowsRotation = false
  return behavior
  }())

// Block the board rotation
animator?.addBehavior({
  let behavior = UIDynamicItemBehavior(items: [board])
  behavior.allowsRotation = false
  return behavior
  }())
The hoop is ready to go. Let’s take care of the ball, starting with a custom subclass of UIImageView with a rounded physics body, just like the Ellipse class:
class Ball: UIImageView {
  override var collisionBoundsType: UIDynamicItemCollisionBoundsType {
    return .Ellipse
  }
}
We can then istantiate the ball as a common UIImageView:
let ball: Ball = {
  let ball = Ball(frame: CGRect(x: 0, y: 0, width: 28, height: 28))
  ball.image = UIImage(named: "ball")
  return ball
}()
Finally we set its physical properties:
// Set the elasticity and density of the ball
animator?.addBehavior({
  let behavior = UIDynamicItemBehavior(items: [ball])
  behavior.elasticity = 1
  behavior.density = 3
  behavior.action = {
    if !CGRectIntersectsRect(self.ball.frame, self.view.frame) {
      self.setupBehaviors()
      self.ball.center = CGPoint(x: 40, y: self.view.frame.size.height - 100)
    }
  }
  return behavior
  }())
In this bit of code I set the elasticity (how much it should bounce after a collision), density (think of it as the weight) and a handy action closure that resets the world state when the ball exits the play area (the main view).
Collisions and gravity
I mentioned the new anchored property of UIDynamicItemBehavior, which disables the dynamic behavior of an object while keeping it in the collision’s loop. Sounds like a great way to build a steady floor:
// Anchor the floor
animator?.addBehavior({
  let behavior = UIDynamicItemBehavior(items: [floor])
  behavior.anchored = true
  return behavior
  }())
Forget to set this property and you’ll be scratching your head a lot. I know I did.
Ok, everything is set, it just needs some gravity and a set of collisions:
animator?.addBehavior(UICollisionBehavior(items: [leftHoop, rightHoop, floor, ball]))
animator?.addBehavior(UIGravityBehavior(items: [ball]))
The gravity is a field behavior that applies a down force of 1 point per second as default. The collision behavior takes as parameter only the views that should collide with each other. The world is set up, now we can apply an instantaneous force to the ball and keep our fingers crossed:
let push = UIPushBehavior(items: [ball], mode: .Instantaneous)
push.angle = -1.35
push.magnitude = 1.56
animator?.addBehavior(push)
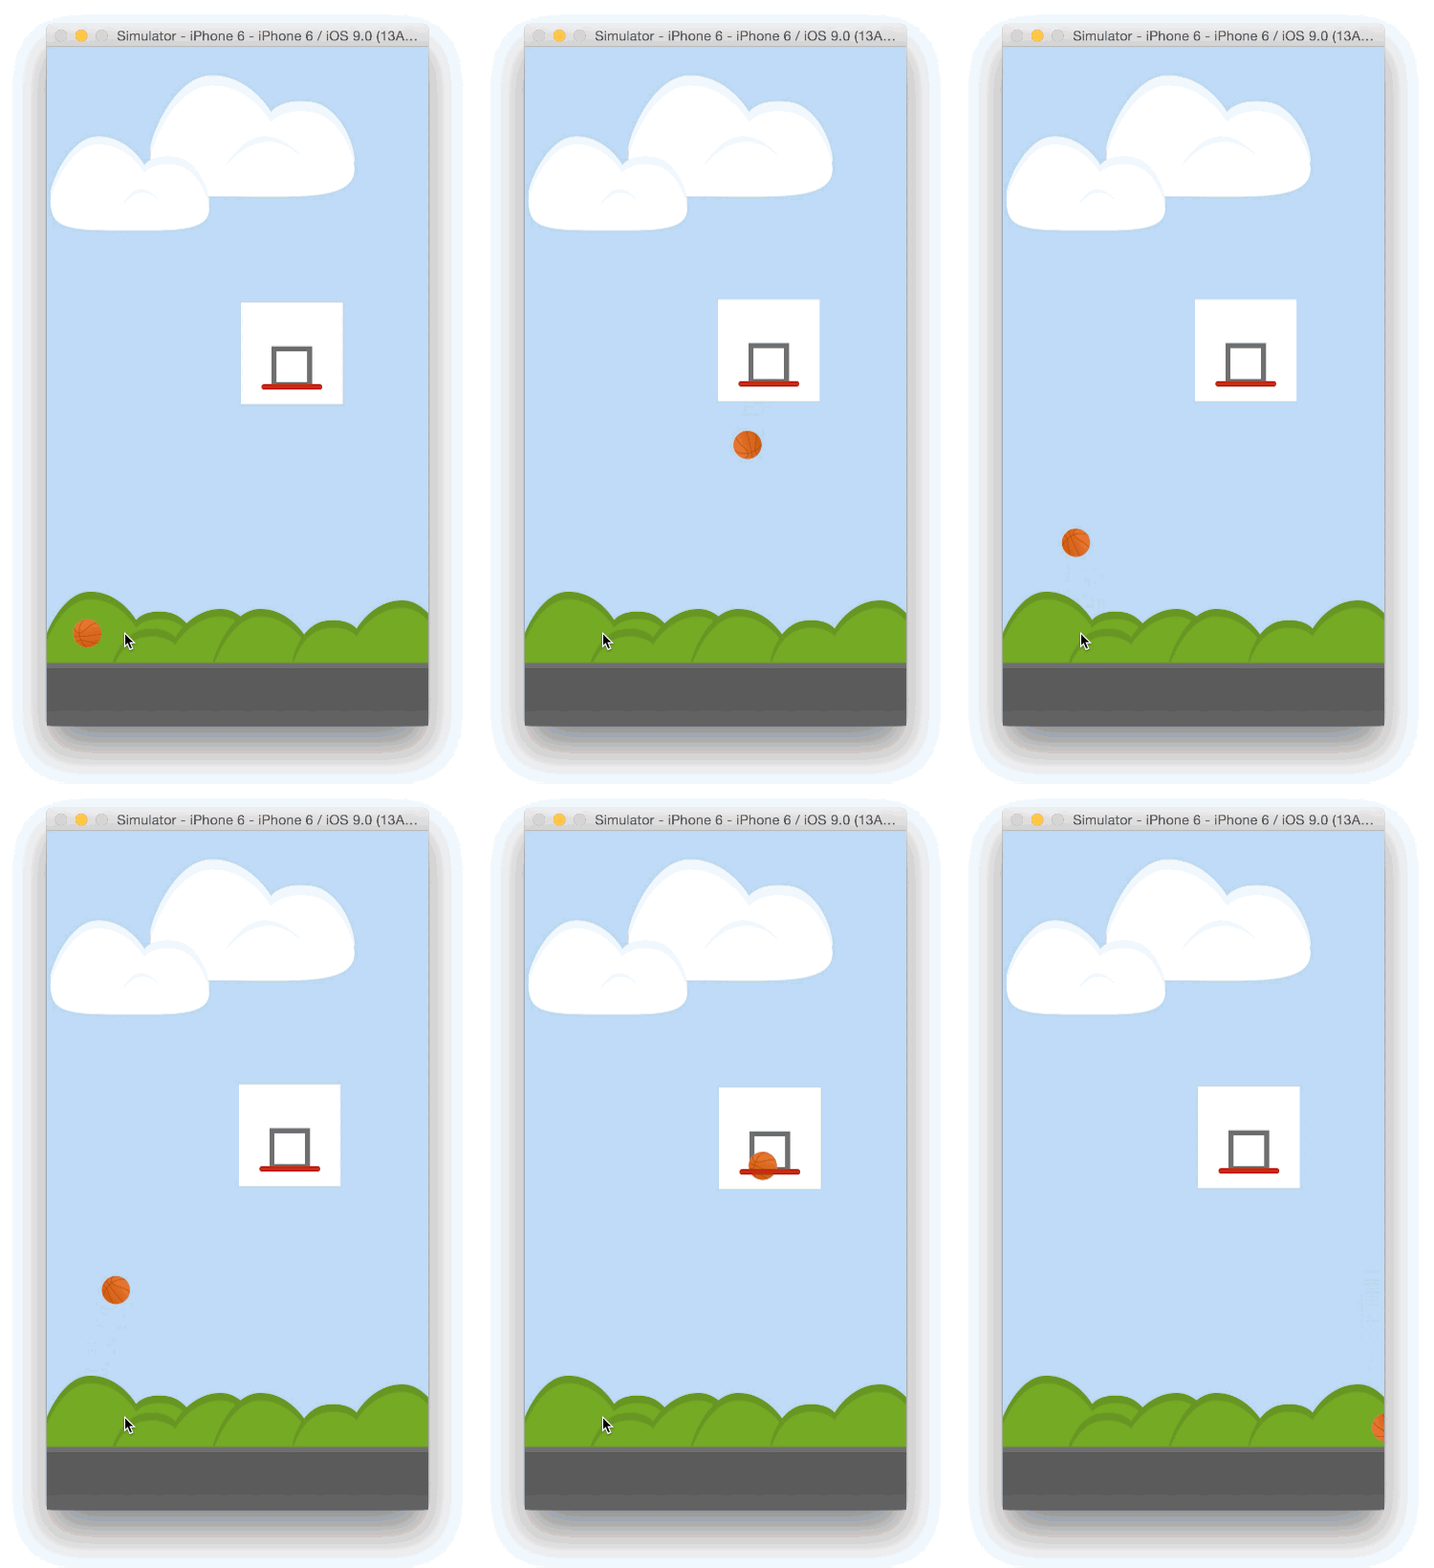
And there you go, it’s really rough around the edges, but that was a lot of fun to build (yes, the clouds and the bushes are the same drawing, like in Super Mario).
As always you can find the source on our GitHub page.
Until next time,
Andrea - @theandreamazz